Tuesday, 18 November 2014

EM12c debugging your plugin

In this world of everything retro I've decided to go back to my root and do some development, now I'm not talking about coding on the Commadore PET, or the BBC Model B, nor for that matter something a little more useful like Microsoft MASM or good old 'C'.

I've started to develop a plugin for Oracle Enterprise Manager 12c.  Okay so writing a Metadata plugin is not really coding, but it's as close as I get these days and to be quite frank it's as close as I want to get as frustration at the serious lack of useful documentation is pushing me over the edge.

Good job that I've got access to some people in the know, shame it's not written down, hence this blog.

So these are the two magic parameters for anyone thinking about developing a plugin.

  • traceEnabled=true
  • loglevel=ALL,CONSOLE

To use these parameters you need to append them to the end of the URL that you are using to access your Oracle Enterprise Manager Console.  So in my case (URL changed to protect the innocent);

https://myEM12c.somecompany.com:7799/em/faces/core-mpcustom-page?target=myTraget.somecompany.com&type=myNewTargetType&_afrLoop=374837279826719&_afrWindowMode=0&_afrWindowId=s2v1e9pyi_1#!%40%40%3F_afrWindowMode%3D0%26target%3DmyTraget.somecompany.com%26type%3DmyNewTargetType%26_afrWindowId%3Ds2v1e9pyi_1%26_afrLoop%3D374837279826719%26_adf.ctrl-state%3Ds2v1e9pyi_9&loglevel=ALL,CONSOLE&traceEnabled=true

So what does this do ? Just hack it and see, whats the worst that can happen.  However if you are a little more cautions lets look at each in turn.

loglevel=ALL,CONSOLE

This parameter basically creates a small debug window at the bottom of the page for you to see what has been going on, it saves trawling through the Enterprise Manager log files only to find nothing, much like when you've hit a wayward tee shot into the trees, spend minutes looking for it, pissing off the group behind, not to mention your playing colleagues only to emerge with your tail between your legs saying, that's another blob then.  Anyway back to the point of the blog.

Here is a screen show of what you should see, obviously with your own log messages.

traceEnabled=true

This parameter provides a little more.  You basically get a floating window in which you can browse some of the objects on the page.  You can see the total time it took in milliseconds as well as the time it took to service the particular Metadata service.  There are also two options at the bottom of the page; "Show Trace Details" and "Show Item Details", the latter simply showing the SOAP Request/Response and former showing more timing details about the highlighted Page/Service.


Now before you think to yourself these look like cool parameters let's go and see what I can see if I use them on the other target type home pages, don't bother you won't see anything unless the page is a Metadata only UI, which most are not.

Wednesday, 15 October 2014

ERROR : Error during Virtual Machine creation: OVM repository not set in task parameters. (60391)

Right so, I've been playing around with Exalogic 2.0.6.0.0 and it's been challenging to say the least. I'd like to think that its because I don't know what I'm doing but I fear the reality may be something quite different.

Someone who I considered to be a friend suggested that I might benefit from applying the latest PSU taking my Exalogic to 2.0.6.0.2, so following this advice I set about the necessary procedure, 3 days later having taken lots of precautions, like headache tablets, caffeine and the unavoidable backups I rewarded myself with a pat on the back and some celebration beer and signed off thinking that all was well.

The next morning I woke with a renewed vigor, eager to march on and make full use of all those CPU's and processing cycles, so I set about creating some new VM's, that's when my head hit the desk in despair again.  So I tried a different template, same problem, by now I'm thinking WTH did I bother, should of stayed on 2.0.6.0.0.

The way I figured it I had three choices;

  1. Commit hari kari;
  2. Use the backup and recover the the last known position; or
  3. Soilder on to the finish line

Obviously option 1 was a bit extreme and option 2 could have gone equally horribly wrong so I went for my usual option of unavoidably hacking my way to the finish line.

After several hours of trawling MOS I stumbled on;
  • Bug 18161671 : POST UPGRADE VSERVER CREATE FAILS WITH OVM REPOSITORY NOT SET IN TASK PARAMETERS
  • Bug 18229800 : ERROR DURING VIRTUAL MACHINE CREATION: OVM REPOSITORY NOT SET IN TASK PARAMETER
  • Bug 18254689 : OVM REPOSITORY NOT SET IN TASK PARAMETERS. (60391)
As is all too often the case the out look didn't look good, varying degrees of "you're fecked" and "could not reproduce" all drawing a blank.  No to be deterred I marched on.

I spotted a glimmer of hope though, one of the bugs suggested that I could verify the problem by looking at my cache;

To do this I needed to;
  1. navigate to https://<ECIP>/xvm/#StorageRepository 
  2. authenticate as root user
  3. open the link under the Name column which should look similar to NORM-sr$///0004fb00000300005cacceasd1c1ede 
  4. then find the section "Attributes"
  5. followed by the subsection "StorageRepository" and check the attributes. 
BINGO! null values.


So now what!  Apparently I need to refresh my cache in EMOC by starting it in development mode.  Great but how the dickens do you do that !

Calling in the cavalry from the OpsCenter team I started EMOC in debug mode;

#/opt/sun/xvmoc/bin/ecadm stop
#/opt/sun/cacao2/bin/cacaoadm set-param -i oem-ec java-flags="-Xms200M -Xmx8192M -server -XX:StringTableSize=27001 -XX:PermSize=128m -XX:MaxPermSize=384m -Xss256k -XX:+UseParallelOldGC -XX:SoftRefLRUPolicyMSPerMB=10000 -XX:-UseCompressedOops -Dsun.security.pkcs11.enable-solaris=false -Djava.endorsed.dirs=/opt/sun/cacao2/share/lib/endorsed -Dxvmserver=false -Dcom.sun.cacao.debug"
#/opt/sun/xvmoc/bin/ecadm start

BANGO, Revisiting the domain model in OpsCenter using https://<ECIP>/xvm/#StorageRepository I now have access to refresh the cache.


Going to the bottom of the page and I clicked on the "Cache Refresh" button;
and then I clicked on the magic "selfHeal" button;
BONGO, we're back in business.

Friday, 29 August 2014

OVMAPI_4004E get_api_version I/O error while communicating with HTTP server: Connection refused

Right you've got an Oracle Virtual Server Linux x86_64 and you are trying to discover it in OVM Manager but you keep getting the message "Job Aborted".  Your agent is running but you can't figure out why or where this message is coming from, welcome to my world.

I struggled with this for a few hours hacking around blind, and eventually came up with the answer to my problem, don't ask me how or when but basically I had lost the /etc/ovs-agent/cert directory and all of it's content.

So this is the output from the OVM Job;

Job Construction Phase
----------------------
Job ID: 1409045789587

begin()
Appended operation 'Discover Manager Server Discover' to object 'OVM Foundry : Discover Manager'.
commit()
Completed Step: COMMIT

Objects and Operations
----------------------
Object (IN_USE): [DiscoverManager] OVM Foundry : Discover Manager
Operation: Discover Manager Server Discover

Job Running Phase at 2014-08-26 10:36:29,587
----------------------------------------------
Job Participants: []


Actioner
--------
10:36:30,478: Starting operation 'Discover Manager Server Discover' on object 'OVM Foundry : Discover Manager' 
Setting Context to model only in job with id=1409045789587
Job Internal Error (Operation)com.oracle.ovm.mgr.api.exception.FailedOperationException: OVMAPI_4010E Attempt to send command: get_api_version to server: 10.167.242.247 failed. OVMAPI_4004E Server Failed Command: get_api_version , Status: org.apache.xmlrpc.XmlRpcException: I/O error while communicating with HTTP server: Connection refused [Tue Aug 26 10:36:30 BST 2014] [Tue Aug 26 10:36:30 BST 2014]
at com.oracle.ovm.mgr.action.ActionEngine.sendCommandToServer(ActionEngine.java:513)
at com.oracle.ovm.mgr.action.ActionEngine.sendUndispatchedServerCommand(ActionEngine.java:400)
at com.oracle.ovm.mgr.action.ServerAction.getSupportedApiVersions(ServerAction.java:314)
at com.oracle.ovm.mgr.discover.DiscoverEngine.getServerApiVersions(DiscoverEngine.java:446)
at com.oracle.ovm.mgr.discover.DiscoverEngine.discoverNewServer(DiscoverEngine.java:286)
at com.oracle.ovm.mgr.discover.DiscoverEngine.discoverServer(DiscoverEngine.java:203)
at com.oracle.ovm.mgr.op.manager.DiscoverManagerServerDiscover.action(DiscoverManagerServerDiscover.java:48)
at com.oracle.ovm.mgr.api.collectable.ManagedObjectDbImpl.executeCurrentJobOperationAction(ManagedObjectDbImpl.java:1156)
at com.oracle.odof.core.AbstractVessel.invokeMethod(AbstractVessel.java:356)
at com.oracle.odof.core.AbstractVessel.invokeMethod(AbstractVessel.java:333)
at com.oracle.odof.core.storage.Transaction.invokeMethod(Transaction.java:869)
at com.oracle.odof.core.Exchange.invokeMethod(Exchange.java:244)
at com.oracle.ovm.mgr.api.manager.DiscoverManagerProxy.executeCurrentJobOperationAction(Unknown Source)
at com.oracle.ovm.mgr.api.job.JobEngine.operationActioner(JobEngine.java:230)
at com.oracle.ovm.mgr.api.job.JobEngine.objectActioner(JobEngine.java:322)
at com.oracle.ovm.mgr.api.job.InternalJobDbImpl.objectCommitter(InternalJobDbImpl.java:1383)
at com.oracle.odof.core.AbstractVessel.invokeMethod(AbstractVessel.java:356)
at com.oracle.odof.core.AbstractVessel.invokeMethod(AbstractVessel.java:333)
at com.oracle.odof.core.BasicWork.invokeMethod(BasicWork.java:106)
at com.oracle.odof.command.InvokeMethodCommand.process(InvokeMethodCommand.java:92)
at com.oracle.odof.core.BasicWork.processCommand(BasicWork.java:81)
at com.oracle.odof.core.TransactionManager.processCommand(TransactionManager.java:752)
at com.oracle.odof.core.WorkflowManager.processCommand(WorkflowManager.java:467)
at com.oracle.odof.core.WorkflowManager.processWork(WorkflowManager.java:525)
at com.oracle.odof.io.AbstractClient.run(AbstractClient.java:42)
at java.lang.Thread.run(Thread.java:662)
Caused by: com.oracle.ovm.mgr.api.exception.IllegalOperationException: OVMAPI_4004E Server Failed Command: get_api_version , Status: org.apache.xmlrpc.XmlRpcException: I/O error while communicating with HTTP server: Connection refused [Tue Aug 26 10:36:30 BST 2014]
at com.oracle.ovm.mgr.action.ActionEngine.sendAction(ActionEngine.java:909)
at com.oracle.ovm.mgr.action.ActionEngine.sendCommandToServer(ActionEngine.java:509)
... 31 more


FailedOperationCleanup
----------
Starting failed operation 'Discover Manager Server Discover' cleanup on object 'OVM Foundry : Discover Manager'
Complete rollback operation 'Discover Manager Server Discover' cleanup on object 'OVM Foundry : Discover Manager'

Rollbacker
----------
10:36:30,778: Starting rollbacker...
Executing rollback operation 'Discover Manager Server Discover' on object 'OVM Foundry : Discover Manager'
Complete rollback operation 'Discover Manager Server Discover' completed with direction=DONE
10:36:30,786: Rollbacker completed...

Objects To Be Rolled Back
-------------------------
Object (IN_USE): [DiscoverManager] OVM Foundry : Discover Manager


Write Methods Invoked
-------------------
10:36:30,314 Class=InternalJobDbImpl vessel_id=7887 method=addTransactionIdentifier accessLevel=6 owningTx=1409045790314
10:36:30,315 Class=DiscoverManagerDbImpl vessel_id=235 method=discoverServer accessLevel=6 owningTx=1409045790314
10:36:30,333 Class=InternalJobDbImpl vessel_id=7887 method=setCompletedStep accessLevel=6 owningTx=1409045790314
10:36:30,333 Class=InternalJobDbImpl vessel_id=7887 method=setAssociatedHandles accessLevel=6 owningTx=1409045790314
10:36:30,590 Class=DiscoverManagerDbImpl vessel_id=235 method=nextJobOperation accessLevel=6 owningTx=1409045790314
10:36:30,590 Class=InternalJobDbImpl vessel_id=7887 method=setFailedOperation accessLevel=6 owningTx=1409045790314
10:36:30,778 Class=DiscoverManagerDbImpl vessel_id=235 method=nextJobOperation accessLevel=6 owningTx=1409045790314
10:36:30,786 Class=DiscoverManagerDbImpl vessel_id=235 method=nextJobOperation accessLevel=6 owningTx=1409045790314

Fat lot of good that did me in finding the problem, so I went to the Oracle Virtual Server and checked the status of the agent and looked at the ovs-agent.log and this is what I found.

[root@someserver ~]# service ovs-agent status
log server (pid 5489) is running...
notification server (pid 5493) is running...
remaster server (pid 5496) is running...
monitor server (pid 5498) is running...
ha server (pid 5499) is running...
stats server (pid 5502) is running...
xmlrpc server dead but pid file exists

ovs-agent.log

[2014-08-26 11:19:10 5493] INFO (notificationserver:213) NOTIFICATION SERVER STARTED
[2014-08-26 11:19:10 5496] INFO (remaster:140) REMASTER SERVER STARTED
[2014-08-26 11:19:10 5498] INFO (monitor:23) MONITOR SERVER STARTED
[2014-08-26 11:19:10 5499] INFO (ha:89) HA SERVER STARTED
[2014-08-26 11:19:10 5502] INFO (stats:26) STAT SERVER STARTED
[2014-08-26 11:19:10 5504] ERROR (daemon:131) Error starting xmlrpc server: [('system library', 'fopen', 'No such file or directory'), ('BIO routines', 'FILE_CTRL', 'system lib'), ('SSL routines', 'SSL_CTX_use_PrivateKey_file', 'system lib')]
Traceback (most recent call last):
  File "/usr/lib64/python2.4/site-packages/agent/lib/daemon.py", line 129, in run_service
    func()
  File "/usr/lib64/python2.4/site-packages/agent/daemon/xmlrpc.py", line 305, in serve_forever
    AgentXMLRPCRequestHandler, logRequests=False)
  File "/usr/lib64/python2.4/site-packages/agent/daemon/xmlrpc.py", line 201, in __init__
    ctx.use_privatekey_file(KEYFILE)
Error: [('system library', 'fopen', 'No such file or directory'), ('BIO routines', 'FILE_CTRL', 'system lib'), ('SSL routines', 'SSL_CTX_use_PrivateKey_file', 'system lib')]
[2014-08-26 11:19:10 5502] DEBUG (linuxstats:44) Error getting VM stats: Command: ['xm', 'list', '--long'] failed (1): stderr: Error: Unable to connect to xend: No such file or directory. Is xend running?
 stdout:

Still didn't help, which flipping file are we talking about, arrrggghhhh.  Right lets get down to xen and see what it can tell me.

[root@someserver xen]# pwd
/var/log/xen

[root@someserver xen]# tail -10 xend-debug.log
Xend started at Mon Aug  4 17:12:33 2014.
Exception starting xend: invalid xend config xend-relocation-server-ssl-key-file: directory '/etc/ovs-agent/cert/key.pem' does not exist

At last a ray of hope we now know what is missing, so why, when, what to do next.  Haven't got time to go into why or when cause it's Friday evening and I need beer.  Solution was to use the ovs-agent-keygen executable.

[root@someserver cert]# pwd
/etc/ovs-agent/cert

[root@someserver cert]# ls

[root@someserver cert]# ovs-agent-keygen -f
Generating RSA private key, 1024 bit long modulus
............++++++
..++++++
e is 65537 (0x10001)
You are about to be asked to enter information that will be incorporated
into your certificate request.
What you are about to enter is what is called a Distinguished Name or a DN.
There are quite a few fields but you can leave some blank
For some fields there will be a default value,
If you enter '.', the field will be left blank.
-----
Country Name (2 letter code) [GB]:State or Province Name (full name) [Berkshire]:Locality Name (eg, city) [Newbury]:Organization Name (eg, company) [My Company Ltd]:Organizational Unit Name (eg, section) []:Common Name (eg, your name or your server's hostname) []:Email Address []:
Please enter the following 'extra' attributes
to be sent with your certificate request
A challenge password []:An optional company name []:Signature ok
subject=/CN=someserver.com
Getting Private key

[root@someserver cert]# ls
certificate.pem  key.pem  request.pem

Bobs your uncle, fanny's your aunt as they say.  We're back in the game.

Friday, 22 August 2014

Server Not Owned By This Manager

So if you've ever lost your Oracle VM Manager and not been able to recover it because you never took a backup, shame on you, you should have followed the procedure documented here 4.12 Backing Up Oracle VM Manager; says he having been in this situation many times.

For the hundreds of you left I'll walk you through the options to get out of the mess you're in.

The first option and only currently supported option is to re-install the OVM Manager and specify the UUID on installation as discussed in 4.13 Restoring Oracle VM Manager.

If like me you've done neither and you already have another OVM Manager and you just want to move the old servers to it don't panic all is not lost.

When you install an Oracle Virtual Server it creates a number of Berkeley DB files in /etc/ovs-agent/db.

[root@someserver1 ~]# ls -ltrh /etc/ovs-agent/db/
total 44K
-rw-r--r-- 1 root root 12K Jun 24  2013 repository
-rw-r--r-- 1 root root 12K Mar 17 16:47 aproc
-rw------- 1 root root 12K Jun 13 17:48 exports
-rw-r--r-- 1 root root 12K Aug  6 15:49 server


[root@someserver1 ~]# file server
server: Berkeley DB (Hash, version 8, native byte-order)

So what I hear you ask, well while unsupported these files can be manipulated using the OVS command line utilities.

[root@someserver1 ~]# ls -ltrh /usr/sbin/ovs-agent*
-rwxr-xr-x 1 root root 1.2K Feb  5  2013 /usr/sbin/ovs-agent-userdel
-rwxr-xr-x 1 root root 1.4K Feb  5  2013 /usr/sbin/ovs-agent-useradd
-rwxr-xr-x 1 root root 3.6K Feb  5  2013 /usr/sbin/ovs-agent-rpc
-rwxr-xr-x 1 root root 3.1K Feb  5  2013 /usr/sbin/ovs-agent-passwd
-rwxr-xr-x 1 root root 2.1K Feb  5  2013 /usr/sbin/ovs-agent-keygen
-rwxr-xr-x 1 root root 2.6K Feb  5  2013 /usr/sbin/ovs-agent-fake-uuid
-rwxr-xr-x 1 root root 2.3K Feb  5  2013 /usr/sbin/ovs-agent-dlm
-rwxr-xr-x 1 root root 5.6K Feb  5  2013 /usr/sbin/ovs-agent-db

For example ovs-agent-db allows you to both query and update items in these files;

[root@someserver1 ~]# /usr/sbin/ovs-agent-db --help
usage: ovs-agent-db [option] ...

Examples:
  ovs-agent-db create_db db
  ovs-agent-db delete_db db
  ovs-agent-db dump_db db
  ovs-agent-db truncate_db db
  ovs-agent-db update_db db value
  ovs-agent-db read_item db key
  ovs-agent-db delete_item db key
  ovs-agent-db write_item db key value
  ovs-agent-db upgrade_databases
  ovs-agent-db get_cluster_db_home

Use python syntax to specify the "value" parameters:
  * None: "None"
  * string: "'some string'"
  * number: "1234.5678", "0x1234"
  * boolean: "True", "False"
  * list: "['foo', 1234]"
  * tuple: "('foo', 1234)"
  * dict: "{'foo': 'bar', 1: 2}"

options:
  --version             show program's version number and exit
  -h, --help            show this help message and exit
  -d DB_HOME, --db-home=DB_HOME
                        specify db home [default: /etc/ovs-agent/db]
  -c, --cluster-db-home
                        use cluster db home

So to dump the contents of the server DB file you would simply do;

[root@someserver1 ~]# /usr/sbin/ovs-agent-db dump_db server
{'cluster_state': 'DLM_Ready',
 'clustered': True,
 'is_master': False,
 'manager_core_api_url': 'https://{some_encrypted username}:{some_encrypted_password}@{some_ip_address}:7002/ovm/core/OVMManagerCoreServlet',
 'manager_uuid': '0004fb000001000dontdothisforreal',
 'node_number': 1,
 'pool_alias': 'MyServerPool1',
 'pool_member_ip_list': ['{someserver1_ip}', '{someserver2_ip}', '{someserver3_ip}'],
 'pool_uuid': '0004fb000002000018facb931f623134',
 'pool_virtual_ip': '{someserver_pool_ip}',
 'poolfs_nfsbase_uuid': '',
 'poolfs_target': '/dev/mapper/360014059ac279e4d573bd4c38d9c9cd6',
 'poolfs_type': 'lun',
 'poolfs_uuid': '0004fb000005000078a55251d7d969ad',
 'registered_hostname': '{some_server}',
 'registered_ip': '{some_server_ip}',
 'roles': set(['xen', 'master', 'utility']),
 'stat_interval': 160}

The values in {} have been changed to protect the innocent and they also don't appear in the output.

Before you can change move these servers over to the new manager you need to find your current OVM Manager UUID, you can get this by clicking on "Help" followed by "About" in the OVM Manager user interface.


The UUID is also available on the OVM Manager file system in the /etc/sysconfig/ovmm file.

[root@ovmmserver ~]# cat /etc/sysconfig/ovmm
RUN_OVMM=YES
JVM_MEMORY_MAX=4096m
JVM_MAX_PERM=512m
DBBACKUP=/u01/app/oracle/mysql/dbbackup
DBBACKUP_CMD=/opt/mysql/meb-3.8/bin/mysqlbackup
UUID=0004fb0000010000d1b7eca67025e1c1

Now onto actually changing the values but checking that you get your commands right first;

[root@someserver1 ~]# ovs-agent-db read_item server manager_uuid
'0004fb000001000dontdothisforreal'

[root@someserver1 ~]# ovs-agent-db write_item server manager_uuid "'0004fb0000010000d1b7eca67025e1c1'"

[root@someserver1 ~]# ovs-agent-db read_item server manager_uuid
'0004fb0000010000d1b7eca67025e1c1'

Don't go patting yourself on the back, were not done yet.  So now we need to re-discover the server in the new OVM Manager but before we do we need to fix the mounted pool file systems and repositories and make them think that they are also owned by the same OVM Manager.

So let's look at the mounted file systems;

[root@someserver1 ~]# df -kh
Filesystem            Size  Used Avail Use% Mounted on
/dev/sda3             421G  1.2G  398G   1% /
/dev/sda1              99M   28M   67M  29% /boot
tmpfs                 286M     0  286M   0% /dev/shm
none                  286M   40K  286M   1% /var/lib/xenstored
/dev/mapper/360014059ac279e4d573bd4c38d9c9cd6
                       20G  271M   20G   2% /poolfsmnt/0004fb000005000078a55251d7d969ad
/dev/mapper/360014057549345adab90d4b2ddab8ed6
                     1000G  590G  411G  59% /OVS/Repositories/0004fb000003000074aaa55a9bad117a
someserver1.example.com:/nfs
                      421G  1.2G  398G   1% /OVS/Repositories/0004fb00000300000284796418b4eb9d

You'll notice that on my system I have an NFS mount back to itself, I'll explain this in another blog but essentially I am presenting the wasted space on /dev/sda back to the server so that it can be put to good use.

Server Pool Filesystem

Inside each of the mounted pool file systems you will find a .ovspool file which contains the value OVS_POOLFS_MGR_UUID which represents the old OVM Manager UUID,  This needs to be changed too.

[root@someserver1 ~]# cat /poolfsmnt/0004fb000005000078a55251d7d969ad/.ovspoolfs
OVS_POOLFS_UUID=0004fb000005000078a55251d7d969ad
OVS_POOLFS_MGR_UUID=0004fb000001000042f6cecb9c3dc70f
OVS_POOLFS_VERSION=3.0
OVS_POOLFS_POOL_UUID=0004fb000002000018facb931f623134
OVS_POOLFS_LUN_UUID=360014059ac279e4d573bd4c38d9c9cd6

Each Pool Filesystem contains other Berkeley DB files that do not need to be changed, but I'm listing them here for completeness.

[root@someserver1 ~]# ls -ltrh /poolfsmnt/0004fb000005000078a55251d7d969ad/db
total 36K
-rw------- 1 root root 12K Jul 22  2013 monitored_vms
-rw------- 1 root root 12K Feb 18 16:01 server_pool_servers
-rw------- 1 root root 12K Aug  5 17:10 server_pool

Reminder to dump the contents of these files use ovs-agent-db command but this time you have to specify the --db-home parameter which points to the location of the database files.

File: server_pool

This file describes the server pool characteristics.

[root@someserver1 ~]# ovs-agent-db --db-home=/poolfsmnt/0004fb000005000078a55251d7d969ad/db dump_db server_pool
{'auto_remaster': True,
 'pool_alias': 'MyServerPool1',
 'pool_master_hostname': '{someserver1.example.com}',
 'pool_member_ip_list': ['{someserver1_ip}', '{someserver2_ip}', '{someserver3_ip}'],
 'pool_uuid': '0004fb000002000018facb931f623134',
 'pool_virtual_ip': '{someserver_pool_ip}'}

File: server_pool_servers

This file contains details about the servers which are part of the pool.

[root@someserver1 ~]# ovs-agent-db --db-home=/poolfsmnt/0004fb000005000078a55251d7d969ad/db dump_db server_pool_servers
{'someserver1.example.com': {'is_master': False,
                               'node_number': 0,
                               'registered_ip': '{someserver1_ip}',
                               'roles': set(['xen', 'utility'])},
 'someserver2.example.com': {'is_master': False,
                               'node_number': 1,
                               'registered_ip': '{someserver2_ip}',
                               'roles': set(['xen', 'master', 'utility'])},
 'someserver3.example.com': {'is_master': False,
                               'node_number': 2,
                               'registered_ip': '{someserver3_ip}',
                               'roles': set(['xen', 'master', 'utility'])}}

File: monitored_vms

Finally the VM guests being monitored by this pool.

[root@someserver1 ~]# ovs-agent-db --db-home=/poolfsmnt/0004fb000005000078a55251d7d969ad/db dump_db monitored_vms
{'0004fb00-0006-0000-54df-920567f90cd6': {'repo_id': '0004fb000003000074aaa55a9bad117a',
                                          'vm_id': '0004fb000006000054df920567f90cd6'},
 '0004fb00-0006-0000-63e2-a5ccff965b20': {'repo_id': '0004fb00000300000284796418b4eb9d',
                                          'vm_id': '0004fb000006000063e2a5ccff965b20'}}

Repository Filesystem

Inside each of the mounted repository file systems you will find a .ovsrepo file which contains the 
value OVS_REPO_MGR_UUID which represents the old OVM Manager UUID,  This needs to be changed too.  

[root@someserver1 ~]# cat /OVS/Repositories/0004fb000003000074aaa55a9bad117a/.ovsrepo
OVS_REPO_UUID=0004fb000003000074aaa55a9bad117a
OVS_REPO_VERSION=3.0
OVS_REPO_MGR_UUID=0004fb0000010000d1b7eca67025e1c1
OVS_REPO_ALIAS=MY QNAP TS-119

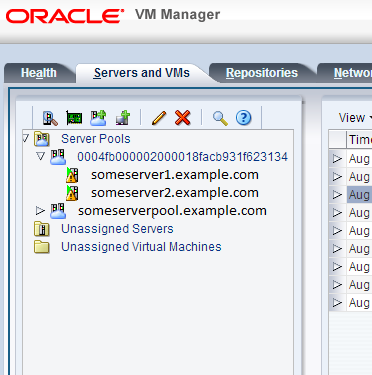
Having made all those changes its now time to re-discover the servers.  At this point I didn't choose to use the re-discovery option, instead I chose to first remove the server and then re-add it from within the UI.

During the discovery OVM Manager will also discover the storage and server pools that this server knows about, however it will not use the 'pool_alias' as was shown when we ran the 'ovs-agent-db dump' command.  The new server pool will be shown in the UI with the 'pool_uuid' value, you can edit this after discovery.


If you don't change any of the values correctly you could end up in the same position as me with a slightly schizophrenic environment where the repositories claim to be owned by another manager so be very careful but don't worry too much as they can be changed after the event by refreshing them from the UI.


Good luck and make sure you follow the proper procedures in future.

Wednesday, 6 August 2014

In the beginning

In the beginning there was an enthusiastic young computer studies college student who thought he could change the world, little did he know what was round the corner.

Lurching from one technology to the next in an attempt to stay ahead of the game, learning by the seat of his pants he's programmed in many languages; been a database, systems and web administrator all at different times and never fully mastering any.

When he's not been behind a keyboard he has tried his hand at so many sports you wouldn't believe it but he's never really mastered any; there's a pattern emerging here ...

He's always played football and never been very good at that either but refuses to give up even to this day. Golf will always get the better of him, the fairways are something that he yearns for, if he could take a set of hedge trimmers in his bag they'd be of much more use than some of his clubs, but he refuses to give golf up too; that looks like another pattern to me ...

Not afraid of anything, or more probably unaware of his own limitations believing he can do as good a job as anyone he's even been a Car Mechanic, Electrician, Plumber, Bricklayer and Landscape Gardner (where the hedge trimmers are his number one tool) all of which have been unavoidable mainly due to the fact that he's as tight as a badgers arse.

Fast forward to today and he's learned to deal with the despair; happily married, a proud father of three and suffice to say a lot of unavoidable hacking along the way which he feels it's about time he shared.